Chocolate Mousse Cups are one of those desserts that feel like a little luxury, but they’re lighter than you expect and melt the second your spoon hits them. I love how they look elegant enough for a fancy dinner, yet the process is calm, simple, and almost soothing to make. After years of testing desserts for both weeknights and celebrations, this is the one I always come back to when I want something that never fails. They’re perfect for date nights, holidays, dinner parties, or anytime you want a make-ahead dessert that feels special. Stick with me, and I’ll show you how these Chocolate Mousse Cups come together effortlessly every single time.
Why You’ll Fall in Love with These Chocolate Mousse Cups
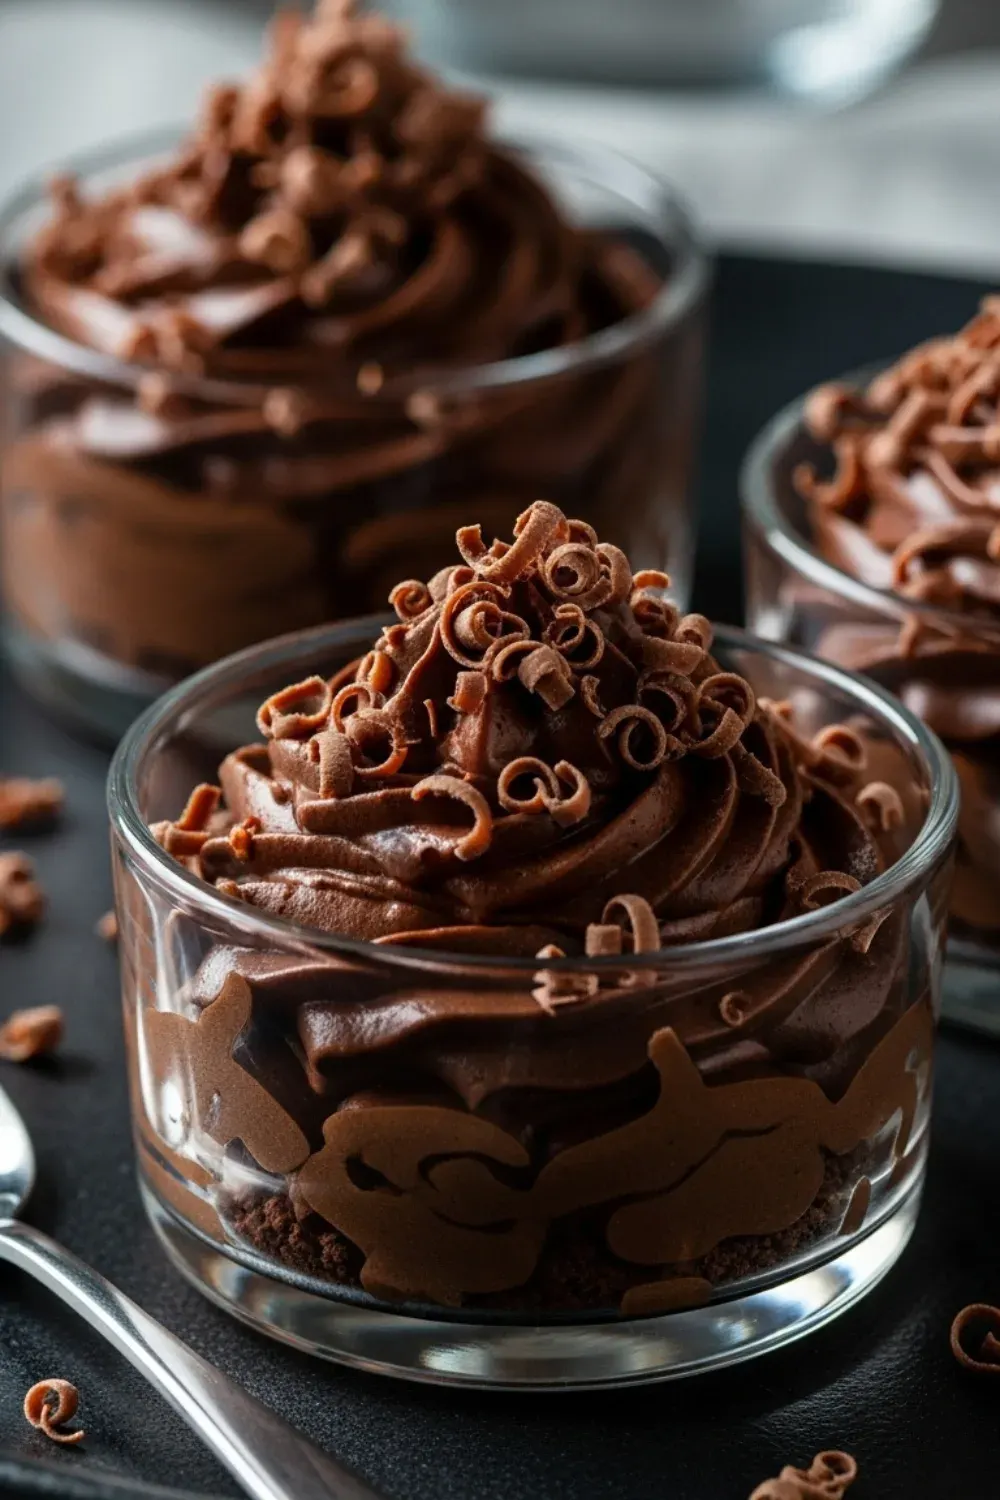
The texture alone is enough to win you over. These Chocolate Mousse Cups are light, fluffy, and deeply chocolatey, like a soft cloud with real cocoa soul. I love that they use simple, classic ingredients you probably already trust and keep in your kitchen. There’s no baking, no stress, and they’re easy to make ahead, which feels like a small gift to your future self. Served in little cups, they look bakery-style fancy without any extra effort.
Daisy’s Secret to Perfectly Silky Chocolate Mousse Cups
Here’s what makes the difference every time. I always use high-quality chocolate, because the flavor can’t hide, and it shouldn’t have to. Letting the chocolate mixture cool before folding is huge; rushing this step is how mousse turns dense or grainy. Fold gently, be patient, and give it enough chill time, and the mousse rewards you with a smooth, airy texture that feels effortless but tastes expertly made.
What You’ll Need
Semi-sweet or bittersweet chocolate
This is the heart of Chocolate Mousse Cups, so use a chocolate you truly enjoy eating on its own. Good chocolate melts smoothly and gives the mousse its rich, deep flavor.
Heavy whipping cream
Cream adds softness and balance, making the mousse feel light instead of heavy. I’ve learned that full-fat cream gives the silkiest texture every single time.
(This cream is used in the mousse itself; extra whipped cream is optional for topping.)
Eggs (separated)
The yolks bring richness, while the whites create that airy, cloud-like lift. This simple step is what transforms melted chocolate into a true mousse.
Granulated sugar
Sugar smooths out the bitterness of the chocolate and helps stabilize the eggs. You don’t need much, just enough to let the chocolate shine.
Optional toppings (whipped cream, chocolate shavings, berries)
These are the finishing touches that make each cup feel special. A little contrast in texture or color turns simple Chocolate Mousse Cups into a dessert worth lingering over.
Options for Substitutions
One thing I love about Chocolate Mousse Cups is how flexible they are. You can swap semi-sweet for bittersweet or dark chocolate if you like things less sweet, or use a gentle sugar alternative that works for baking. If eggs worry you, pasteurized eggs are a great option, and I’ve even seen egg-free versions work with careful folding, though the texture shifts slightly. For toppings, dairy-free whipped cream works well, and a splash of coffee, vanilla, or citrus zest can quietly deepen the flavor without changing the soul of the dessert.
Step-by-Step Guide to Making Chocolate Mousse Cups
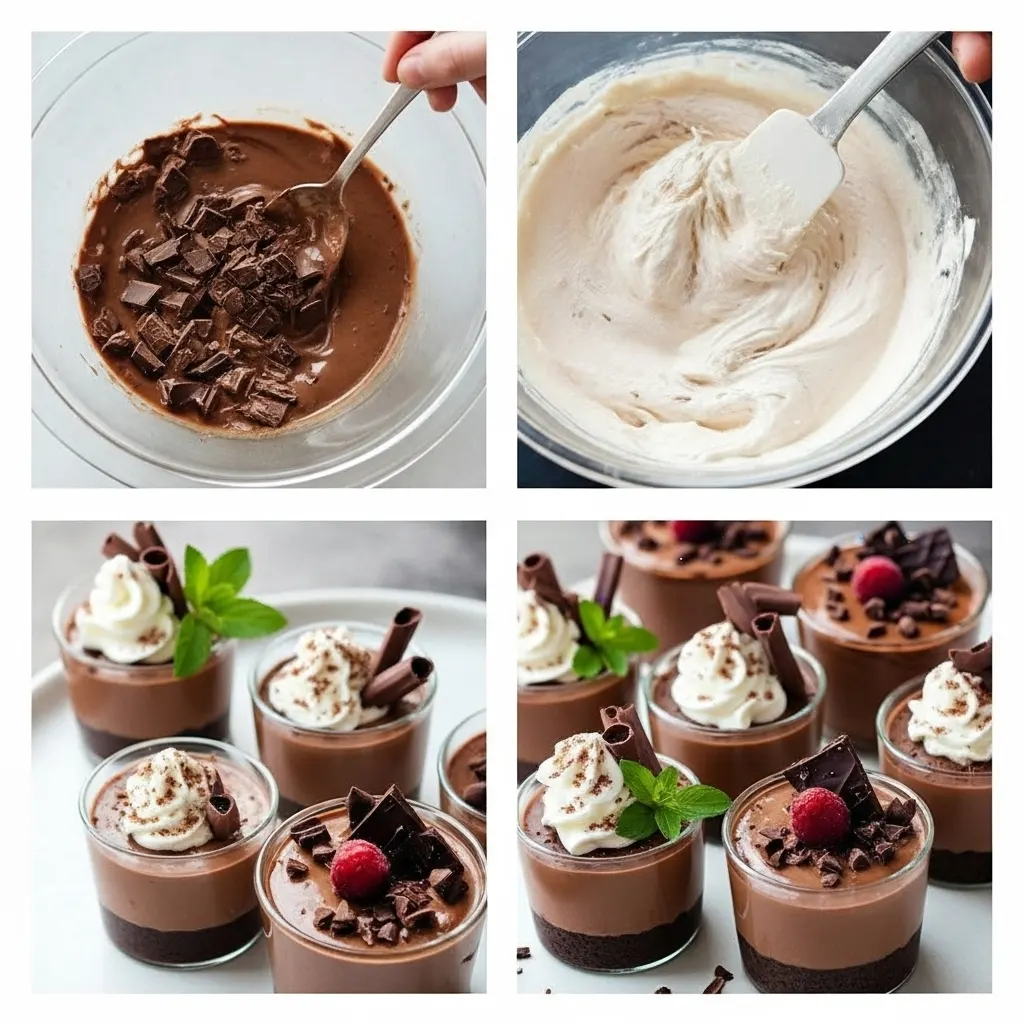
Step 1: Prepare the Chocolate Base
Start by chopping the chocolate into small, even pieces so it melts without stress. I like to take an extra minute here because uneven chunks can melt at different speeds. Warm the cream gently or use very low heat, then stir until the chocolate turns smooth and glossy. This should feel calm, not rushed.
Step 2: Separate and Prepare the Eggs
Crack the eggs and separate them carefully, one at a time. I always use two bowls so a broken yolk doesn’t ruin the whites. Mix the yolks with sugar until the texture looks smooth and pale. This step builds richness and balance.
Step 3: Whip the Egg Whites
Whip to soft peaks for a softer mousse, or stiff peaks for a slightly firmer set. Watch closely here, because over-whipping can turn them dry fast. I stop as soon as they hold their shape but still look silky. Think soft clouds, not foam.
Step 4: Lighten the Chocolate Mixture
Once the chocolate mixture has cooled slightly (it should be warm, not hot), stir in the egg yolk and sugar mixture until fully combined and smooth.
Add a small scoop of egg whites into the chocolate base first. This loosens the mixture and makes folding easier later. Stir gently until it looks lighter and less dense. This step sets you up for success.
Step 5: Fold and Finish the Mousse
Now fold in the remaining egg whites slowly, using wide, gentle strokes. If you’re adding whipped cream, do it here and treat it the same way. I always remind myself that air is the goal, not speed. Stop folding once it looks even.
Step 6: Portion and Chill
Spoon the mousse into cups or ramekins and smooth the tops lightly. Cover and refrigerate until fully set and chilled. This rest time deepens the flavor and firms the texture. The hardest part is waiting, but it’s worth it.
How Long to Chill the Chocolate Mousse Cups
Chocolate Mousse Cups need time to rest so the texture can fully settle. At a minimum, give them about two hours in the fridge so they firm up enough to hold a spoon. For the best flavor and that smooth, creamy bite, I always aim for four hours or overnight. You can also make them up to two days ahead, which makes them perfect for stress-free hosting.
Expert Tips & Troubleshooting
If your mousse feels dense or grainy, it’s often from rushing the folding or mixing while the chocolate was still warm. Over-whipped egg whites or cream can be gently saved by folding in a spoonful of unwhipped cream to soften the texture. To prevent chocolate from seizing, keep heat low and avoid water at all costs. I also swear by glass or metal bowls and a simple spatula, because smooth tools help create a glossy, silky finish every time.
Estimated Nutrition
Each serving of Chocolate Mousse Cups has about 320–360 calories, depending on portion size and toppings. Expect roughly 24g fat, 22g sugar, and 6g protein per cup, thanks to the chocolate, cream, and eggs. These numbers are estimates and can change based on the chocolate you use and how generous you are with toppings. Always treat nutrition values as a guide, not a guarantee.
Storage & Reheating Instructions
Chocolate Mousse Cups keep well in the fridge for up to two days when stored in airtight containers or covered cups. I usually use glass containers or wrap each cup gently so the surface stays smooth and fresh. Freezing isn’t ideal because it can change the creamy texture, though it works in a pinch if you accept a softer set once thawed. There’s no reheating here, this dessert is meant to be served cold, straight from the fridge, just the way mousse should be enjoyed.
FAQs for Chocolate Mousse Cups
Can I make Chocolate Mousse Cups ahead of time?
Yes, Chocolate Mousse Cups are great for making ahead. You can prepare them up to two days in advance and store them in the fridge. This actually helps the flavor and texture improve.
Are Chocolate Mousse Cups safe to eat with eggs?
Chocolate Mousse Cups are safe when handled properly. You can use pasteurized eggs if you prefer extra peace of mind. Always keep the mousse chilled until serving.
Can I make Chocolate Mousse Cups without a mixer?
Yes, you can make Chocolate Mousse Cups without a mixer. It takes a bit more arm work, but a whisk will still get the job done. Just be patient with the egg whites.
Why didn’t my Chocolate Mousse Cups set?
If your Chocolate Mousse Cups didn’t set, the mixture may have been too warm or overmixed. Proper chilling time is also key. Letting it rest fully helps the mousse firm up.
What’s the best chocolate to use for Chocolate Mousse Cups?
The best chocolate for Chocolate Mousse Cups is one you enjoy eating plain. Semi-sweet or bittersweet chocolate melts smoothly and gives the best flavor. Quality matters here.
Conclusion
These Chocolate Mousse Cups work every time because the steps are simple, the ingredients are classic, and the technique is gentle. They feel special enough for holidays or date nights, yet easy enough to make just because you’re craving something sweet. Don’t be afraid to play with toppings or add your own twist, that’s part of the fun. If you loved this recipe, save it, share it, and come back soon, I can’t wait to make something delicious with you again.
If you love this recipe, be sure to check out these other easy chocolate dessert ideas.

Chocolate Mousse Cups
Ingredients
Equipment
Method
- Chop the chocolate into small, even pieces and set aside.
- Gently warm the heavy cream over low heat until steaming, not boiling.
- Add the chopped chocolate to the warm cream and stir until smooth and glossy. Set aside to cool slightly.
- Separate the egg yolks and whites into two clean bowls.
- Stir the egg yolk and sugar mixture into the slightly cooled chocolate mixture until fully combined.
- Whip the egg whites to soft or stiff peaks, depending on desired texture.
- Stir a small scoop of egg whites into the chocolate mixture to lighten it.
- Gently fold in the remaining egg whites using wide, careful strokes.
- Spoon the mousse into individual cups or ramekins.
- Cover and refrigerate until fully set, at least 2 hours or up to 2 days.